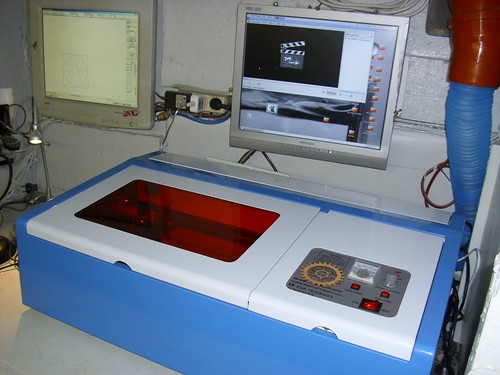
Laser CUTTER, a photo by Diehtmar Graumann on Flickr.Nach langem, sehr langem Überlegen, hin und her… hab ich es doch gewagt…
Ich bestellte mir einen Laser-Cutter bei love-happyshopping…
Es ist ein 40 Watt CO2 Laser.
Leider ist die dongelgeschü…
Nach langem, sehr langem Überlegen, hin und her... hab ich es doch gewagt...
Ich bestellte mir einen Laser-Cutter bei
love-happyshopping...
Es ist ein 40 Watt
CO2 Laser.
Leider ist die dongelgeschütze Software, die den Laserplotter ansteuert, eher "schlicht" gehalten oder besser gesagt... totaler Murks... (
moshidraw)
Es läßt sich nicht auf einem 64bit System betreiben und als Import steht leider nur die PLT-Datei-Variante zur Auswahl.
Verpackt war das Ganze mehr als gut... was wohl auch der Zoll so sah... und mir gleich mal 186 Euro abnahm... na klasse..
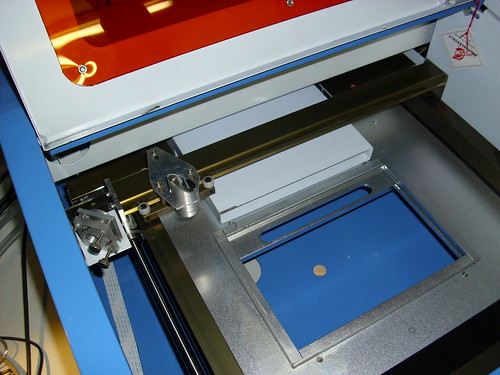
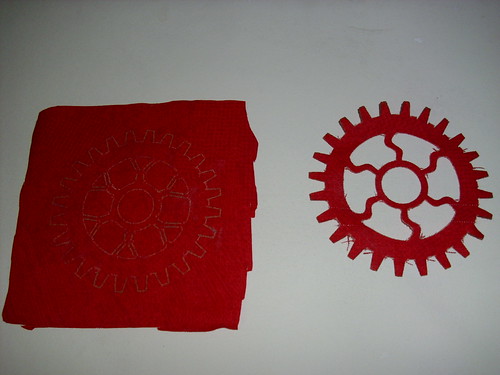
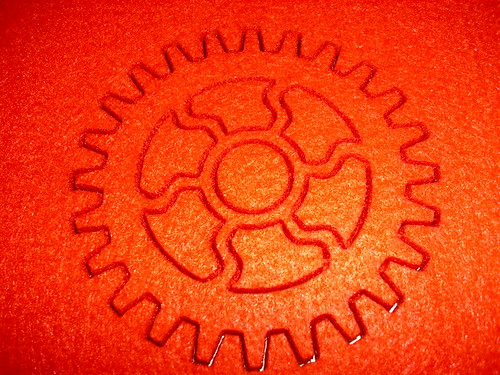
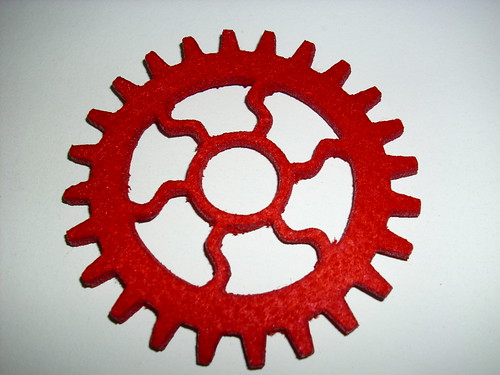
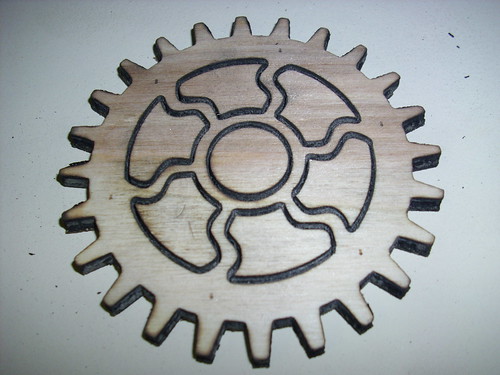
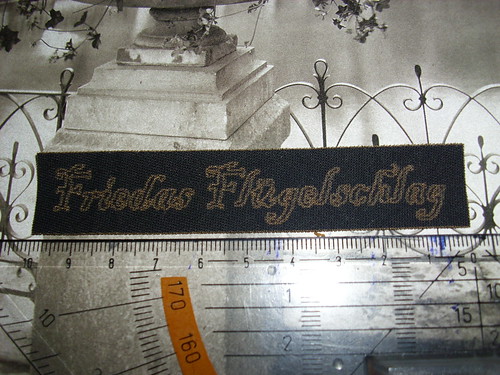
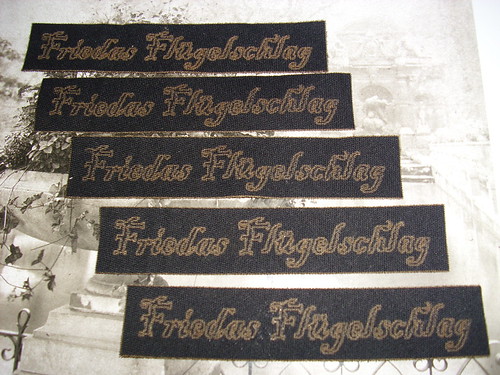
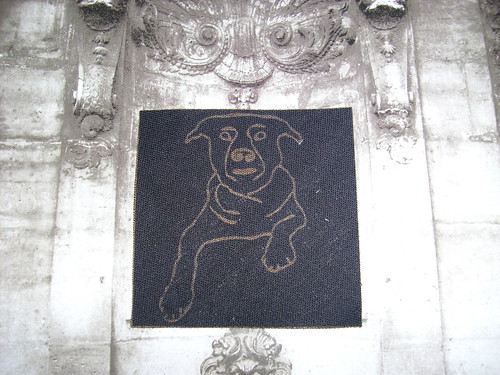
Die ersten Schneid und Graviertests verliefen sehr vielversprechend...
So stellte zum Beispiel Furnier überhaupt keine Hürde dar... auch wurde Stoff und Filz sehr schnell mittels unsichtbarem Licht zerteilt, bzw so weit erhitzt, das man von Gravieren sprechen konnte...
Doch seht selbst...
Eine recht gute, deutschsprachige Anleitung ist
hier zu finden.
Und
hier einige Videodateien zum download.
Ein sehr gutes Forum rund um den Laser-Cutter ist
hier im Netz.
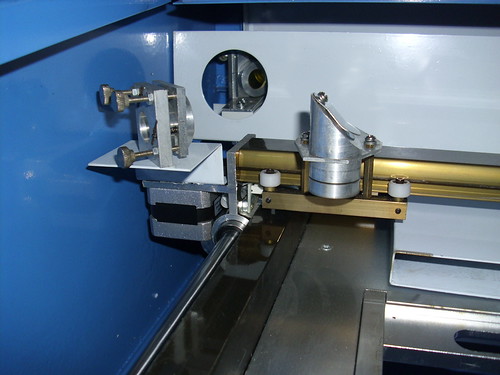
Hier ist das Absaugrohr zu sehen, es wird durch einen Deckendurchbruch in den
darüberliegenden Dachboden geleitet und soll von dort aus über das Dach ins
Freie geführt werden...
Dieses Stück
Sperrholz ließ sich nicht wirklich gut ausschneiden... es waren zig
Durchgänge vonnöten...
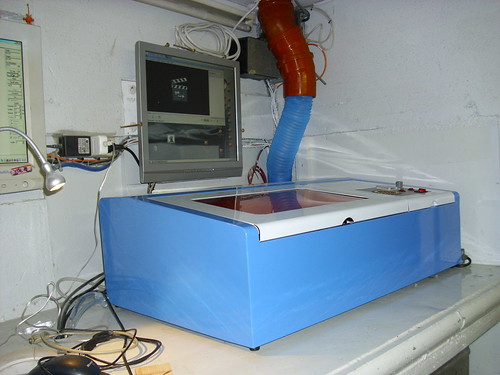
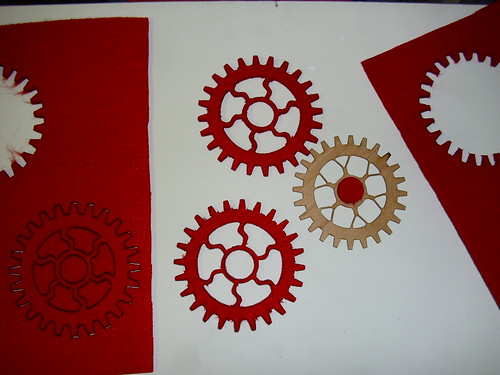
hier noch ein paar neuere Bilder von der zweiten Testserie...
Der Stoff ist von Ikea, und ist
hier zu finden. Er läßt sich ganz wunderbar mit dem Laser schneiden und gravieren. Nicht so viel Erfolg hatte ich bei dickeren Baumwollstoffen und auch dünnerer Stoff machte mir Schwiriegkeiten.
Laser CUTTER, a photo by Diehtmar Graumann on Flickr.Nach langem, sehr langem Überlegen, hin und her… hab ich es doch gewagt…
Ich bestellte mir einen Laser-Cutter bei love-happyshopping…
Es ist ein 40 Watt CO2 Laser.
Leider ist die dongelgeschü…
Nach langem, sehr langem Überlegen, hin und her... hab ich es doch gewagt...
Ich bestellte mir einen Laser-Cutter bei
love-happyshopping...
Es ist ein 40 Watt
CO2 Laser.
Leider ist die dongelgeschütze Software, die den Laserplotter ansteuert, eher "schlicht" gehalten oder besser gesagt... totaler Murks... (
moshidraw)
Es läßt sich nicht auf einem 64bit System betreiben und als Import steht leider nur die PLT-Datei-Variante zur Auswahl.
Verpackt war das Ganze mehr als gut... was wohl auch der Zoll so sah... und mir gleich mal 186 Euro abnahm... na klasse..
Die ersten Schneid und Graviertests verliefen sehr vielversprechend...
So stellte zum Beispiel Furnier überhaupt keine Hürde dar... auch wurde Stoff und Filz sehr schnell mittels unsichtbarem Licht zerteilt, bzw so weit erhitzt, das man von Gravieren sprechen konnte...
Doch seht selbst...
Eine recht gute, deutschsprachige Anleitung ist
hier zu finden.
Und
hier einige Videodateien zum download.
Ein sehr gutes Forum rund um den Laser-Cutter ist
hier im Netz.
Hier ist das Absaugrohr zu sehen, es wird durch einen Deckendurchbruch in den
darüberliegenden Dachboden geleitet und soll von dort aus über das Dach ins
Freie geführt werden...
Dieses Stück
Sperrholz ließ sich nicht wirklich gut ausschneiden... es waren zig
Durchgänge vonnöten...
hier noch ein paar neuere Bilder von der zweiten Testserie...
Der Stoff ist von Ikea, und ist
hier zu finden. Er läßt sich ganz wunderbar mit dem Laser schneiden und gravieren. Nicht so viel Erfolg hatte ich bei dickeren Baumwollstoffen und auch dünnerer Stoff machte mir Schwiriegkeiten.
Nach langem, sehr langem Überlegen, hin und her… hab ich es doch gewagt…
Ich bestellte mir einen Laser-Cutter bei love-happyshopping…
Es ist ein 40 Watt CO2 Laser.
Leider ist die dongelgeschütze Software, die den Laserplotter ansteuert, eher “schlicht” gehalten oder besser gesagt… totaler Murks… (moshidraw)
Es läßt sich nicht auf einem 64bit System betreiben und als Import steht leider nur die PLT-Datei-Variante zur Auswahl.
Verpackt war das Ganze mehr als gut… was wohl auch der Zoll so sah… und mir gleich mal 186 Euro abnahm… na klasse..
Die ersten Schneid und Graviertests verliefen sehr vielversprechend…
So stellte zum Beispiel Furnier überhaupt keine Hürde dar… auch wurde Stoff und Filz sehr schnell mittels unsichtbarem Licht zerteilt, bzw so weit erhitzt, das man von Gravieren sprechen konnte…
Doch seht selbst…
Eine recht gute, deutschsprachige Anleitung ist hier zu finden.
Und hier einige Videodateien zum download.
Ein sehr gutes Forum rund um den Laser-Cutter ist hier im Netz.
Hier ist das Absaugrohr zu sehen, es wird durch einen Deckendurchbruch in den
darüberliegenden Dachboden geleitet und soll von dort aus über das Dach ins
Freie geführt werden…
Dieses Stück Sperrholz ließ sich nicht wirklich gut ausschneiden… es waren zig
Durchgänge vonnöten…
hier noch ein paar neuere Bilder von der zweiten Testserie…
Der Stoff ist von Ikea, und ist hier zu finden. Er läßt sich ganz wunderbar mit dem Laser schneiden und gravieren. Nicht so viel Erfolg hatte ich bei dickeren Baumwollstoffen und auch dünnerer Stoff machte mir Schwiriegkeiten.
Nach langem, sehr langem Überlegen, hin und her... hab ich es doch gewagt...
Ich bestellte mir einen Laser-Cutter bei
love-happyshopping...
Es ist ein 40 Watt
CO2 Laser.
Leider ist die dongelgeschütze Software, die den Laserplotter ansteuert, eher "schlicht" gehalten oder besser gesagt... totaler Murks... (
moshidraw)
Es läßt sich nicht auf einem 64bit System betreiben und als Import steht leider nur die PLT-Datei-Variante zur Auswahl.
Verpackt war das Ganze mehr als gut... was wohl auch der Zoll so sah... und mir gleich mal 186 Euro abnahm... na klasse..
Die ersten Schneid und Graviertests verliefen sehr vielversprechend...
So stellte zum Beispiel Furnier überhaupt keine Hürde dar... auch wurde Stoff und Filz sehr schnell mittels unsichtbarem Licht zerteilt, bzw so weit erhitzt, das man von Gravieren sprechen konnte...
Doch seht selbst...
Eine recht gute, deutschsprachige Anleitung ist
hier zu finden.
Und
hier einige Videodateien zum download.
Ein sehr gutes Forum rund um den Laser-Cutter ist
hier im Netz.
Hier ist das Absaugrohr zu sehen, es wird durch einen Deckendurchbruch in den
darüberliegenden Dachboden geleitet und soll von dort aus über das Dach ins
Freie geführt werden...
Dieses Stück
Sperrholz ließ sich nicht wirklich gut ausschneiden... es waren zig
Durchgänge vonnöten...
hier noch ein paar neuere Bilder von der zweiten Testserie...
Der Stoff ist von Ikea, und ist
hier zu finden. Er läßt sich ganz wunderbar mit dem Laser schneiden und gravieren. Nicht so viel Erfolg hatte ich bei dickeren Baumwollstoffen und auch dünnerer Stoff machte mir Schwiriegkeiten.
Hi Guys, My apologies for removing some posts and comments during last 2 days. The main reason for that were some negative comments I received in my last post. After thinking a lot, I realized that I will never be able to make everyone happy, which…
Hi Guys,
My apologies for removing some posts and comments during last 2 days. The main reason for that were some negative comments I received in my last post.
After thinking a lot, I realized that I will never be able to make everyone happy, which means a lot of people will complain and provide negative comments.
So I decided to do two things:
1) Leave everything open: posts and comments, and not remove any negative comment as people should be free to say whatever they want.
2) Write this post to make things crystal clear.
I spent almost 4 years and lot of money to reach at this point, I can tell you that I have better resolution than all 3d printers under 25K USD (before tax), for this reason I DO expect to make some money out of it. There is nothing wrong on it.
My plan is make most of components open source (90%) and sell just few components (10%) in a kit. But if you don't want to spend any money you can build the remaining 10% at your own as the main concepts will be shared. I have no problem with that.
I do expect to deposit a patent as I don’t want another company selling some components of the kit. But I don’t mind if you do it for your own at your home and share for free. Also this helps me in future in case any company sues me for patent infringement.
I have been working a lot past weeks to prepare things I can share with you but this will take sometime as it is not easy and I can't spend 100% of my time on it because I have my own daily work as I need to make money to live. For this reason I expect to finish this by end of 2011. (I need at least 6 months to finish the software)
I will focus my work on finishing the project so you may see less posts and answers for the comments; and NO answer for negative ones.
Why I need money from this project? It is not to cover my costs… It is to give me enough free time to implement some other cool projects and make them available for mass market. I already have another 3 nice projects that I would like to start but I don’t have time for it.
If you are not happy and think I should not make any penny out of it, you still can follow the blog and build your own 3d Printer. I will be happy with your success in building a 3D Printer on your own and making it open-source!!!
Cheers,
Junior
Hi Folks, I have received some questions and I would like to create a king of FAQ so I can answer some of them. If you have any question, please send a comment in this blog and I will do my best to add it in the next FAQ. You can also add me on…
Hi Folks,
I have received some questions and I would like to create a king of FAQ so I can answer some of them.
If you have any question, please send a comment in this blog and I will do my best to add it in the next FAQ. You can also add me on twitter and send your question there. http://twitter.com/jvelosojunior
BTW, I have receiving many offers from nice people who are willing to support the project somehow. I really appreciate that. I will contact you in when the help is needed.
I intend to create a kind of forum, so we can improve the communication between everyone interested in this project. Any suggestions for this?
What is the current status?
A: I am currently working on the technical material for patent deposit. The machine looks like the existing in the market but it is very different. You can’t see the difference because I can not disclose it before depositing the patent.
This is the main reason you don’t have much detail of the machine here. This process can take few weeks and maybe months. I will keep you updated.
Why is taking so long to start the project on the crowd-funding?
A: I will start the crowd-funding when I finish the patent process, I don’t want to commit with anyone something and later delay to deliver.
How much the kit will cost?
A: The kit will be a very small fraction of the existing machines with similar quality but for sure a bit more expensive then the existing kits as you need very precise components to achieve such resolution.
You won’t get good resolution with simple components you can find in the common hardware store. Wood and common screws and nuts can’t be part of this kit.
Material
Is the material hard?
A: There are huge number of materials with different properties, some hard other soft and flexible.
What colors are available?
A: Yes, there will be different number of colors and I am currently testing a clear material
What resin are you using?
A: I don’t have one single resin that I am using right now; actually I am testing many combinations. You can see that the color and material looks different in some pictures I posted.
Is it UV curable resin?
A: No, It is near UV curable
How much the resin will cost?
A: Not sure, but for good quality resin the price won’t be much different from what you can see in the market right now. I hope the volume can bring the price down once the technology becomes more popular.
Light Source
What is the light source?
A: Projector
Software
Did you develop the software?
A: Yes I did
Is the software capable of building the support structures?
A: Not yet, but it will be soon.
Cheers,
Junior